Wednesday, December 12, 2007

Bokeh!

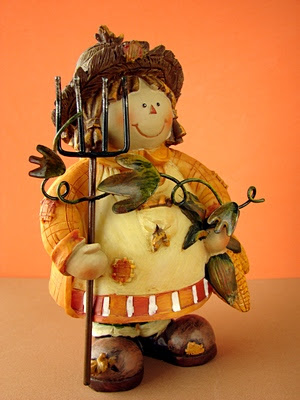
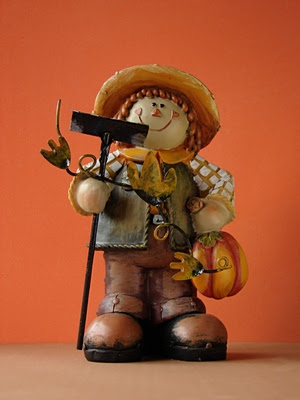
Canon 30D with 50mm f1.8 lens

Sony DCS H2 f3.5

Sony DSC H2 f3.7

Sony DSC H2 f3.7 Plain bokeh

Canon 30D 50mm f1.8 Plain bokeh

Bokeh is the out of focus, fuzzy or blurry backgrounds produced by a camera lens. Some lenses produce smoother and more beautiful bokeh than others. Since I'm not knowledgeable enough to explain the technical aspects, I'll leave it to you to Google "bokeh" and do some research if you are interested.


You can make some very interesting bokeh of your own. Follow this link for instructions by Karsten Stroemvig and be sure to see the several beautiful examples while you are there:

http://www.diyphotography.net/diy_create_your_own_bokeh

If using a regular digital camera, you'll need one with a nice long zoom and a wide aperture. Use a paper punch for the hole and black paper large enough to easily cover lens. You can experiment with different punches and sizes. You may have to cut a hole in the middle of a larger sheet and punch your design in a smaller piece of black paper and tape it over the hole since most punches punch close to the edge of the paper. Set camera to aperture priority mode and widest aperture setting (smallest number possible).

Put the subject to be photographed as close to yourself as you can and still focus on it at full zoom. You will be taking the picture 'through' the hole so you need to be zoomed in to elimate the edges. Have a wide distance between the subject and the background lights. In my image, the Christmas tree lights were about 10 feet behind the figurine. Use a tripod and the timed release on your camera, or a remote shutter release. Hold the black paper tightly against the lens so that no light gets in and the punched out design is in center of lens. Focus on the near subject. Take the picture.

Follow the instructions in the link if you don't want to have to hold the paper in front of the lens. It takes only a few minutes to assemble.

"There's no such thing as a bad photo, just the wrong audience."


Wednesday, December 5, 2007

Photographing Snow

Sadie LOVES snow! Today was her first time to be out in the snow (she is 6 months old now). She didn't want to come back inside. Tomorrow, I'll either make or buy a sweater for her. She's too small to be out for very long with no protection from the cold.


She was recently spayed, as you can see by her shaved belly.


Tip: Your camera's internal light meter will be fooled by all the bright white snow, and your images may come out dark or dingy looking. To avoid this and make the snow look as soft and white as it really is, if you have an EV (Exposure Value) setting on your camera, adjust the setting to compensate for all the brightness. For these images, I had the EV set at +2, as high as it would go.


To the complaint, 'There are no people in these photographs,'
I respond,'There are always two people:
the photographer and the viewer.'

~ Ansel Adams ~


Tuesday, December 4, 2007

Roses in December


The first in this series of images was made right after a gentle early summer shower. The first two images were from a lovely rose garden in my neighbors' yard.

Tip: If you would like to give the 'appearance' of dew or rain droplets on flowers, or to highlight a spider web to make it glisten, you can mist them with a fine spray of water. Don't carry the spray bottle in your camera bag, for obvious reasons.


"God gave us memories so that we might have roses in December."
~ James M. Barrie ~


Wednesday, November 28, 2007

Digital Scrapbooking

Credits:
Papers: Pillowgirl
Template: Lindsay Jane Designs
Font: LOT Sassy


If you have a digital camera and enjoy taking pictures, you may have hundreds, if not thousands of digital photos stored on CDs, unseen by anyone, unless viewed on the computer. Whether captured digitally or on film, pictures are made to be shared and enjoyed.

Printing and framing your photos is great, but eventually there will be no space left for displaying them. Another thing you can do with your pictures so that they can be easily enjoyed is to put them into digital scrapbooks. If you Google "digital scrapbooking" you will find all the information you need on how to do it, many free
page backgrounds and elements to use, pre-made pages into which you insert your own photos, as well as beautiful kits you can download for a reasonable price. Everything in the layout above, except for the pictures of my great-grandsons, was found online as a 'freebie'.

You will need a graphics program of some sort, a computer,
your pictures and a way to transfer them to the computer, a printer, ink and photo paper (if you plan to do your own printing), and a scrapbook for holding the pages.

Two popular programs of many available that you can use for digital scrapbooking are Adobe Elements and its big brother, Adobe Photoshop. A few others that can be used are Corel Paint Shop Pro, Photo Impact, Serif DrawPlus or PhotoPlus. The Gimp, which is similar to Photoshop, is free online. FotoFusion is a very nice program designed especially for digital scrapbooking, though it doesn't have the image editing capabilities of some of the other programs.

If you are creative you can use any of the above programs (limited ability in FotoFusion) to make your own page backgrounds and elements. Add your images, print the pages out yourself or have them printed professionally and display them in vinyl sleeves in scrapbooks. Some common sizes available are 6 inch x 6 inch, 8 x 8, 8 1/2 x 11, and 12 x 12.


"As I have practiced it, photography produces pleasure by simplicity,
I see something special and show it to the camera.
A picture is produced.
The moment is held until someone sees it. Then it is theirs.
Photography, alone of the arts, seems perfected to serve
the desire humans have for a moment - this very moment - to stay."

~ Sam Abell ~


Friday, November 16, 2007

Some Images and a Tip


We have our two granddaughters for the next few days so I think this post is going to be the last until they leave for home. These are a few images I've pulled from my collection to share with you here. The Amish buggy image was taken in Holmes County, Ohio, home to the world's largest Amish community.

Cat image converted to black and white (except for the eyes):

How do you like this pleasant expression?

Another converted image - much nicer in black and white than in color:

Tip: If you happen to have any flash cards left over from an older digital camera and they are not suitable for your newer camera, save them just for transporting images to the store to have them printed, or use them for transferring any kind of files from one computer to another.

"Anyone who has never made a mistake has never tried anything new."
~ Albert Einstein ~

Tuesday, November 13, 2007

Shoestring Studio Continued

(This rack was photographed outdoors to show the full size,
but it's meant to be used indoors.)


Pretty fabrics suitable for backgrounds can be hung over the top of
a collapsible clothes rack. A cheap rack will do - mine was $5 US and is holding up quite well. 1.5 - 2 yards of fabric is plenty if you use a table in front of the rack. Sometimes suitable background fabrics can be found at a good price on remnant tables in fabric stores. If a lacy fabric is used, a solid color can be used behind it, perhaps one of the other fabrics in your collection. If the fabric tends to slip, it can be held in place with safety pins or clothes pins by fastening the front and back layers together near the top of the rack.

This setup, in addition to
a small fold-up, adjustable height, table to set the subjects on, was used for each of the images below.

White crinkly material:

Lacy curtain material:

Black velvet:

Soft, sheer, print fabric:

Same curtain fabric as in the red tulip image:

"Wherever there is light, one can photograph."
~ Alfred Stieglitz ~

Sunday, November 11, 2007

Some Miscellaneous Images & a Tip


I thought you might like to see the companion to yesterday's scarecrow. Here she is, but this time for the additional light I used a sheet of reflective paper that added a warm (gold) cast to the subject.

This is one of my favorite autumn images:


Koi:


In case you didn't know - DON'T throw away the little packets of silica gel you find packed with some items you buy. They're great for keeping dampness out of your camera bag, and anywhere you store lenses and cameras. I keep one in each camera bag and one in every drawer in which I have a lens stored. If you are worried about the bag getting torn, wrap it in a piece of old nylon stocking or other soft netting before dropping it into your camera bag or drawer.


The background behind the silica gel is the piece of reflective paper I used to light up the scarecrow above. Hopefully, it will give you some idea of what to look for, although any reflective gold sheet will be as good. This type is very bright and it sparkles like glitter. You can see other colors in this but if you reflect it onto a sheet of white paper, you'll see the golden glow.

"...words and pictures can work together to communicate more powerfully than either alone."
~ William Albert Allard ~

Saturday, November 10, 2007

Another Use for an Old CD


If you need just a little light on the dark side of a small object, when photographing using light from a window, prop up an old CD with the shiny side facing the dark side of the object. This was taken with window light on the left and light reflecting from the CD on the right side. Keep in mind that the color of the light reflecting off the CD will have the same tone as the color of the CD. A silver, blue or greenish-colored CD will reflect a cool light and a gold-colored CD will reflect warmer light (golden cast).

This is the scarecrow with nothing but window light on the left side.


This is the scarecrow with window light on the left and CD 'light' on the right. Put the CD opposite the window light, and angle it until you get the light right where you want it.


By the way, I like the angle of the shot of the first of these 3 images best. Do you know why? Because the scarecrow's whole smile, more of his hat, and the tines on the rake are visible.


"... it takes a lot of looking before you learn to see the extraordinary."
~ David Bailey, Legendary Photographer ~

Friday, November 9, 2007

Change of Pace


Here is a small series of bird images made last winter. All of these were taken through a double-paned window with a Panasonic FZ20. (Tip: keep windows clean - *smile*)

The above and next two images are of a Junco - one of my favorite little birds.


Brrrrrrr.......


This is a female red-bellied woodpecker. The male has a solid red streak from its beak to the back of its head, while the female's streak is broken with a pale gray band.


Tufted titmouse.


American Goldfinch in its winter coat.


THE END!


"That little bird has chosen his shelter.
Above it are the stars and the deep heaven of worlds.
Yet he is rocking himself to sleep without caring for tomorrow's lodging,
calmly clinging to his little twig,
and leaving God to think for him."
~ Martin Luther ~

Thursday, November 8, 2007

It's in the Bag!

I'm always keeping my eyes open for cheap but useful and lightweight little accessories to carry in my camera bag. These Velcro strips can be opened out flat and stuck together so they don't take up much room. Use them to hold a few stems out of the way of the lens, or to hold a small branch up, or down. Put 2 or more together to make a larger collar to hold several flower stems together in a 'bouquet'. They are strong enough to hold small branches together if you want a more 'leafy' close-up. The bright colors make them easy to remember to take with you when you leave. I'm sure you can think of a dozen more ways to use them!


Small, soft brushes are useful to brush a speck of dirt or a gnat off of a flower petal or some other small subject - that's much easier than getting rid of it in Photoshop after the picture is taken. A clean blush brush is another nice tool to carry and will do the job just as well as the paint brush pictured here. Your brush need not be expensive but it should be soft.


Hair alligator clips are also great for holding stems out of the way - or maybe to isolate just one flower. Sometimes the weight of one of these is just enough to pull a flower into a more desirable position for a lovely macro, yet not so heavy as to do damage to the plant. Be sure to use a clip large enough so as not to damage the stem.


When you want a little more light on the darker side of a small subject, you can sometimes use a piece of crumpled foil to reflect just the right amount. You can also use a sheet of bright white paper. I've even used photo paper for this purpose - the whitest I could find. Any of these can be folded and carried in your bag.

Everything here will fit nicely into a plastic bag with a zipper closure. Speaking of plastic bags, if going from a warm house into the cold outdoors, put your camera, lens attached, into a bag and zip it closed before going out. Once outside, give it a few minutes to become acclimated to the temperature before removing it from the bag. This will prevent moisture and fogging caused by condensation getting inside the camera and lens. Do the same thing if going from the cold outside into a warm house.

"In wisdom gathered over time I have found that every experience
is a form of exploration."

~ Ansel Adams ~

Tuesday, November 6, 2007

A Shot in the Dark

Sometimes it's fun to take pictures at night from a moving vehicle and make up names for them when you view them - it's like looking at clouds and seeing recognizable shapes in them. If you try this technique, it's advisable that someone other than yourself be the driver, for obvious reasons.

"The Protest"

I thought this looked like an angry mob.


"Tunnel"

It wasn't a tunnel, but it looks like it was. It was snowing.


"Frosty's Great Escape"

This was a lit Christmas decoration in someone's yard.


"The Flight"

Lights along the river bank looked like a flock of birds taking flight.

"Photography has not changed since its origin except
in its technical aspects,
which for me are not important."
~ Henri Cartier-Bresson ~


Sunday, November 4, 2007

Sadie has Company

Sam came to visit Sadie. It was the first time for them to meet. Good-natured dog that he is, Sam tolerated Fearless Sadie's climbing, chewing and jumping on him. These images were taken with my trusty little Sony DSC H-2 in sports mode.


Poor Sam. Nice Sam! How gentle he was with her! Not many grown dogs would put up with this!


It was a good romp and now they're friends forever.


"Apply dog logic to life:
eat well, be loved, get petted, sleep a lot,
and dream of a leash-free world."